
|
Sky Spy Construction Report |
The Sky Spy is coming along very slowly. It seems like every time I get back to it, I spend most of my time trying to figure out where it stands, and what I need to do next. Then, once I get to that point, it's time to do something completely unrelated. So, in effect, it goes nowhere.
I hoped to have this completed by the end of May, but I know that's not going to happen. There are just too many details that are left unexplained in the design (and a few problems with the design I have had to work to correct), and more steps to add to include my own modifications. Being that it is scratch-built, it tends to take a bit more head space than a kit does since all the pieces are not nicely cut out, much less arranged in a detailed instruction manual. All I have to go on are a set of plans, and two-pages of text to describe the general steps necessary to construct the beast.
Nevertheless, I intend to post its progress here, partly as motivation for me to continue to work on it...and (hopefully) eventually get it done.
It was never my intention to make this a night-flying aircraft, but I decided to go ahead and install a simple lighting system...just in case. I know I am going to do much experimentation with this aircraft (if I ever finish it), so I may as well make it visible in the dark.
This photo shows the LEDs installed in one wing tip:
Where is the sixth LED, you ask? Well, it's right here:
I mounted one LED, externally, on the leading edge so that I have a reference when making landing
approaches. It has been my experience that the most difficult orientation to see a plane in at
night is when it is coming straight at me. These LEDs will make it possible for me to see the
wingtips on approach, making night landings a more pleasurable experience.
So, the wings have two of the three parallel circuits, which means I have one more to add...
somewhere. I was originally going to put them in the tail, but then for safety reasons, I felt
that would not be a good idea in case there was a failure in the circuit. I have decided to put
the tail on a separate circuit so that if one circuit goes out, I don't lose sight of the whole
plane. I'm only going to put three LEDs, total, in the tail. I want to keep the system simple,
and reserve my power requirements for other on-board equipment. I won't have the option to
reverse polarity in the tail section.
The following is a checklist of what remains to be done on the wing. I haven't created a
checklist for the rest of the plane, yet.
Checklist for the Wing:
Notes:
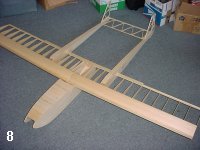
That's where the plane stands at the moment. I have spent a lot of time looking at the pieces
and the plans and the work I have done so far, and I have come to realize that I have done all
the easy work so far. Now the real "fun" begins.
The Checklist
I like checklists. They help me keep on track - especially with projects that keep getting
interrupted...often.
02/10/2002